
Merge fields allow you to easily customize your forms every time you send them out. Merge fields can be used to:
- pre-fill certain form inputs with values that the form owner might know already, making it easier for the end-user to fill only what is needed.
- enter custom details for legal agreements and contracts so they are personalized and accurate every time they're sent out.
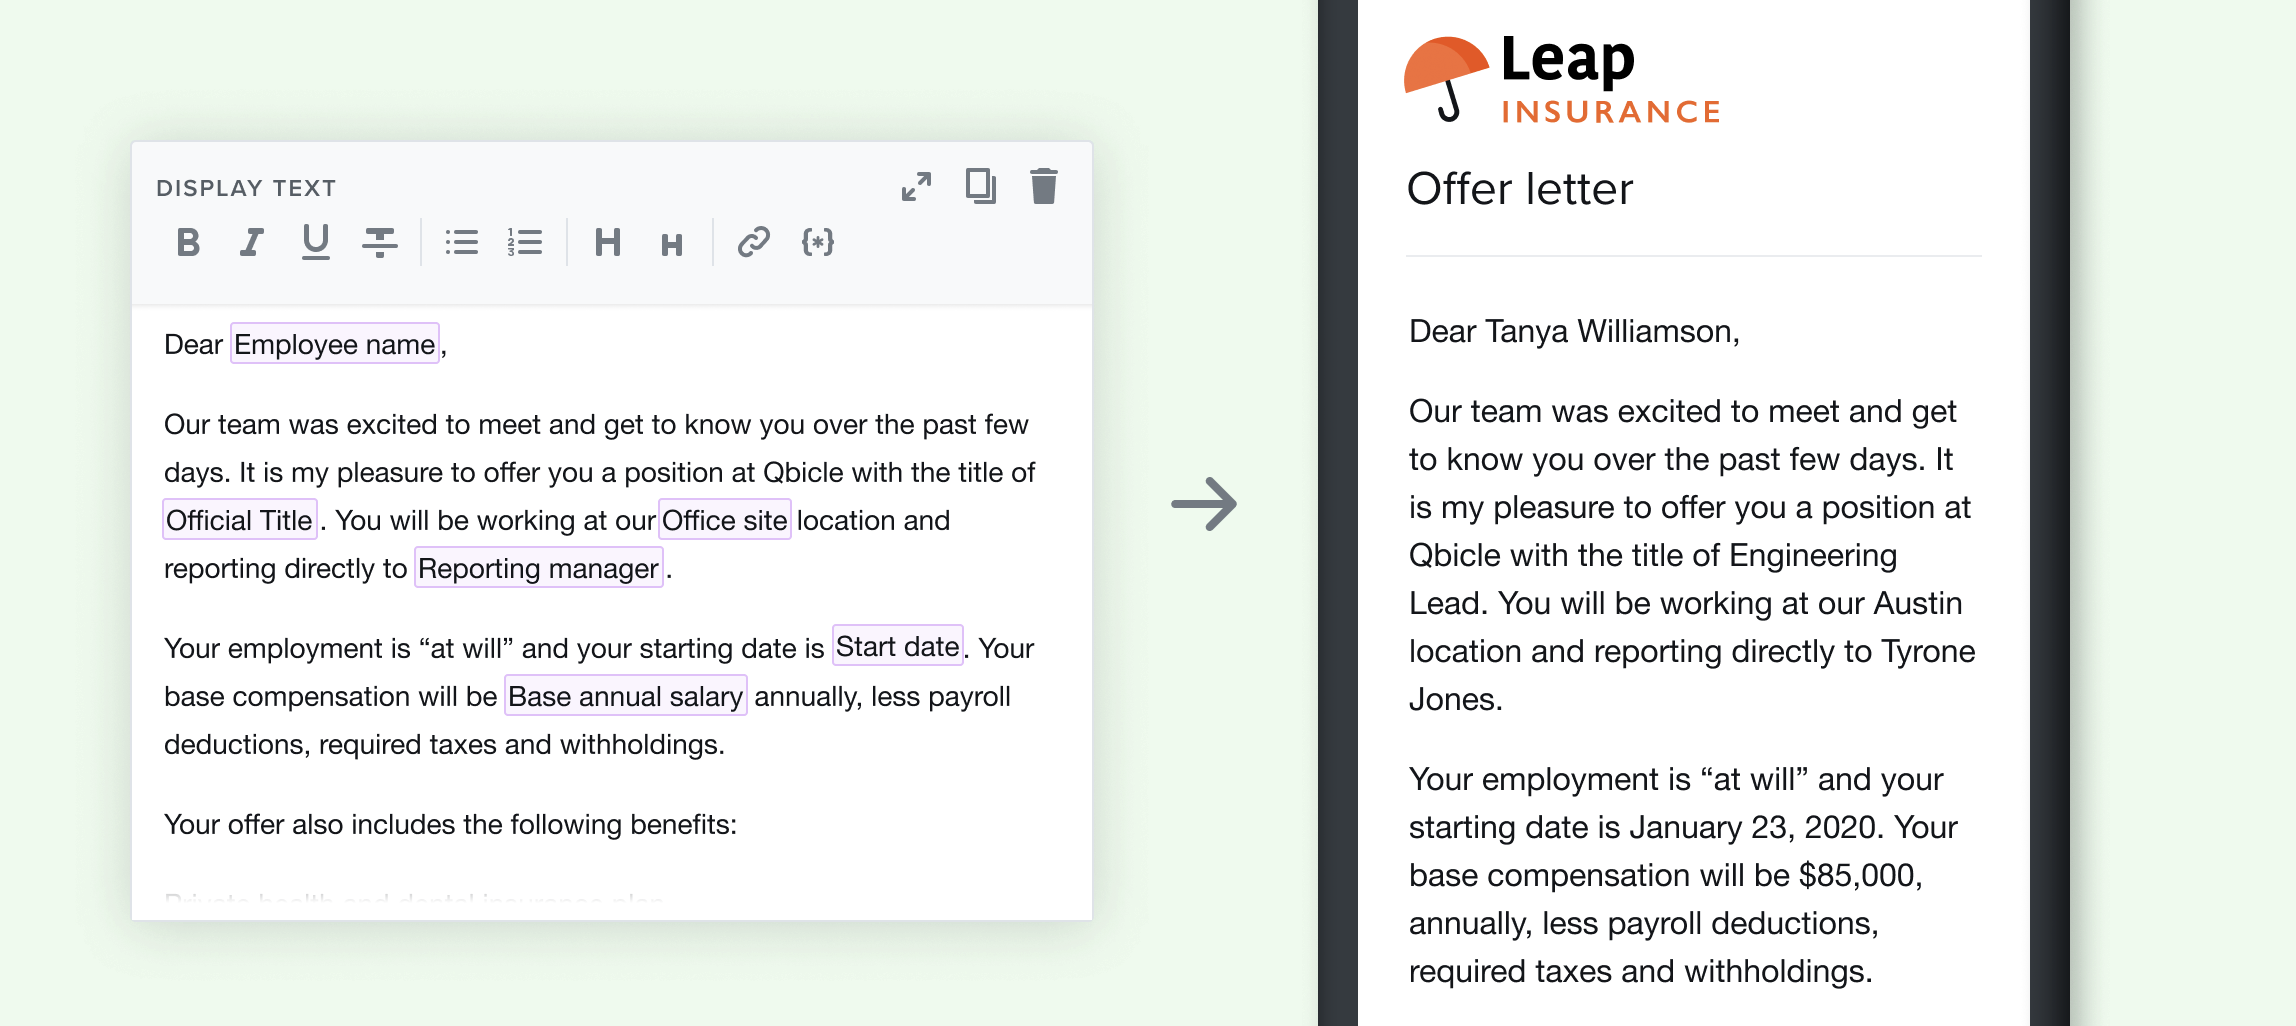
Using merge fields to customize agreement text
One of the most powerful ways to use merge fields is to dynamically update text in your form to customize contracts and agreements each time you send them out. Placing merge tags directly into your contract text allows you to treat them like templates so you know exactly what custom information you need to enter each time without worrying about anything else.
Using merge fields with Pre-fill
For example, if you already know the name of who you are sending a form out to, you can pre-populate that information which makes the form filling process faster for the participant because it’s one less field they will need to fill out.
To use Merge Fields follow the steps below.
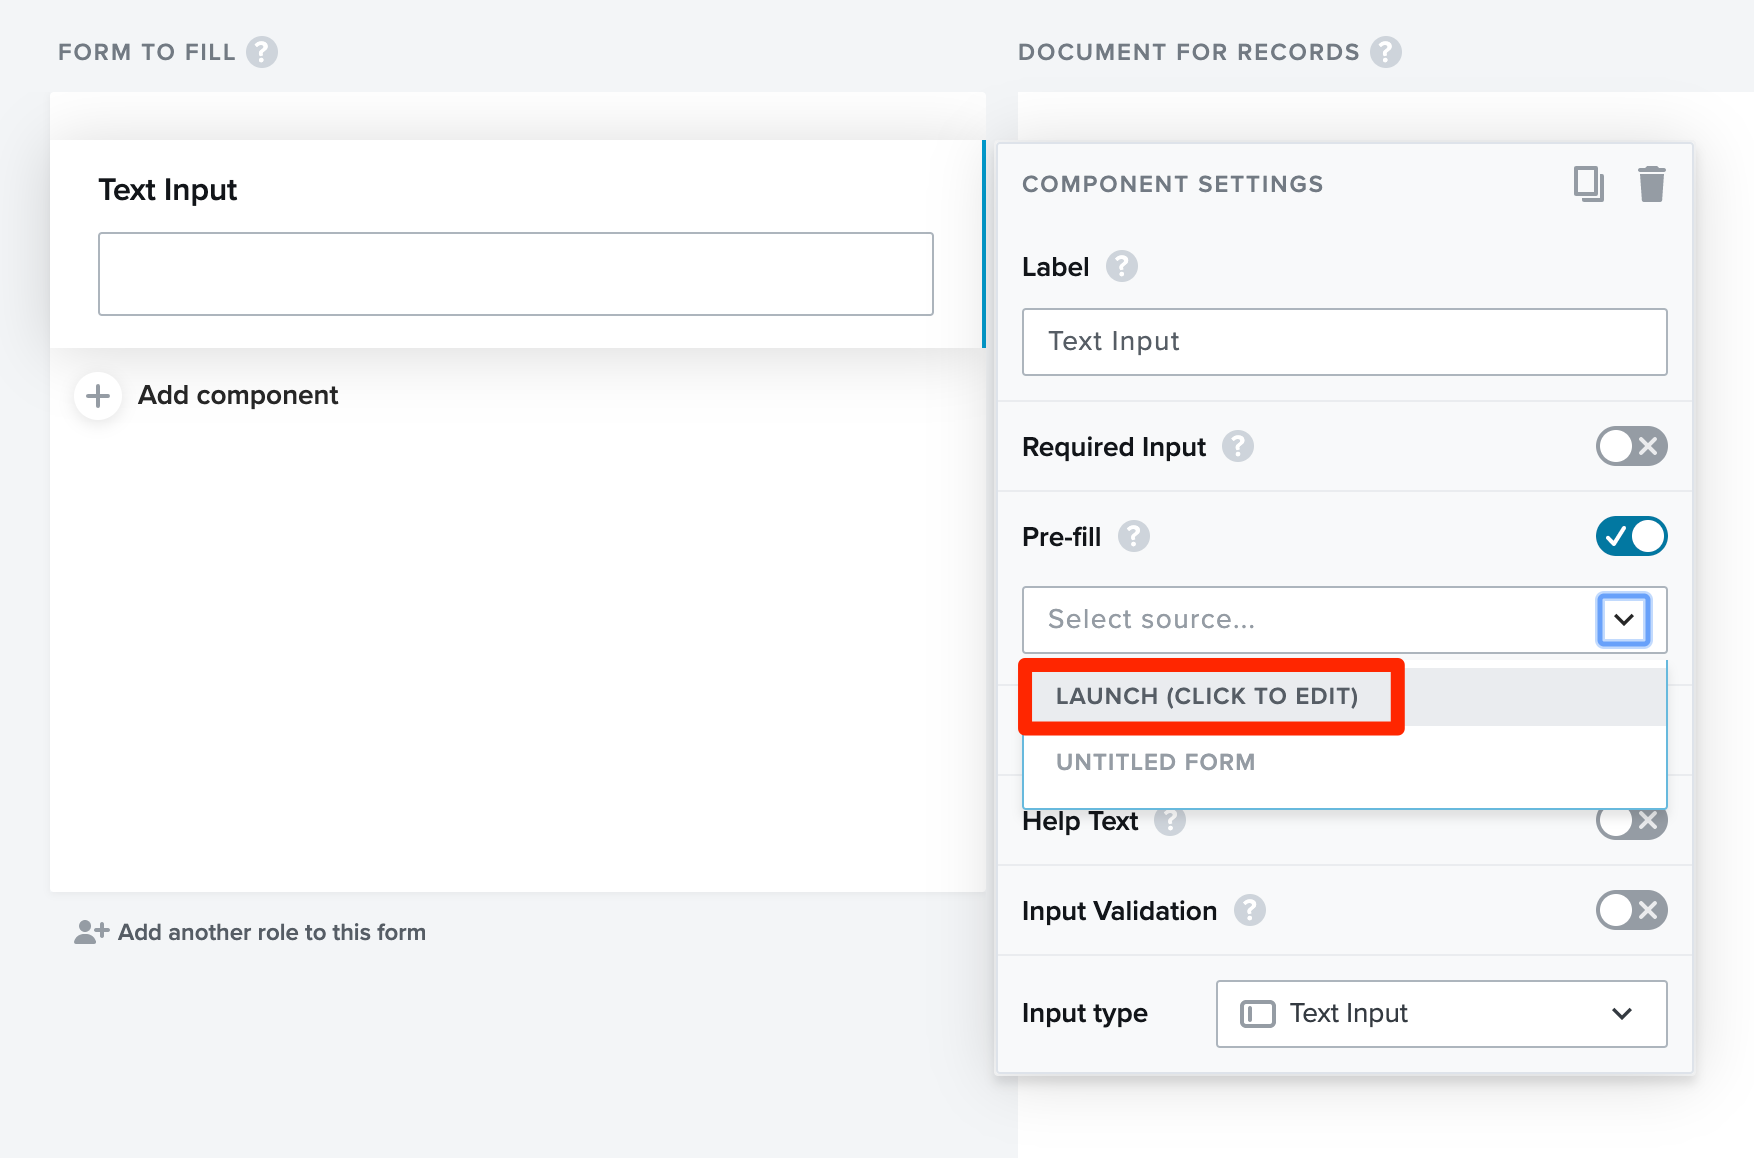
- Within your form, after adding a component navigate to the editor on the right side of the page. The option will be 'Pre-fill', click on the toggle to the right enable this feature for this particular component.
- From the dropdown menu which populates once you turn on 'Pre-fill', click 'LAUNCH (CLICK TO EDIT)'.
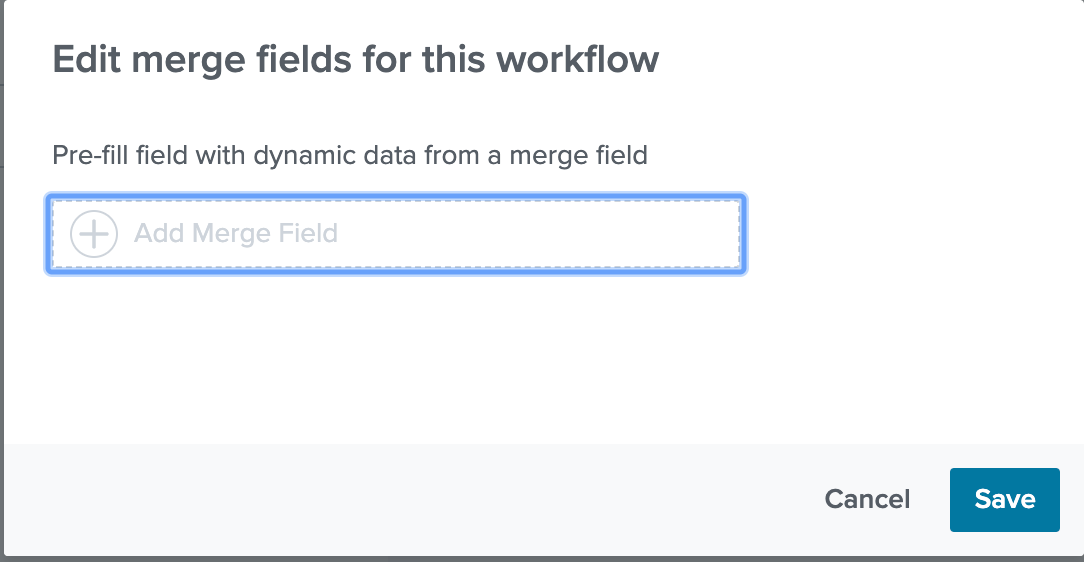
- In the pop up box enter in the label or name of the Merge Field and click save, this will let you know what needs to be filled out when you launch your form.
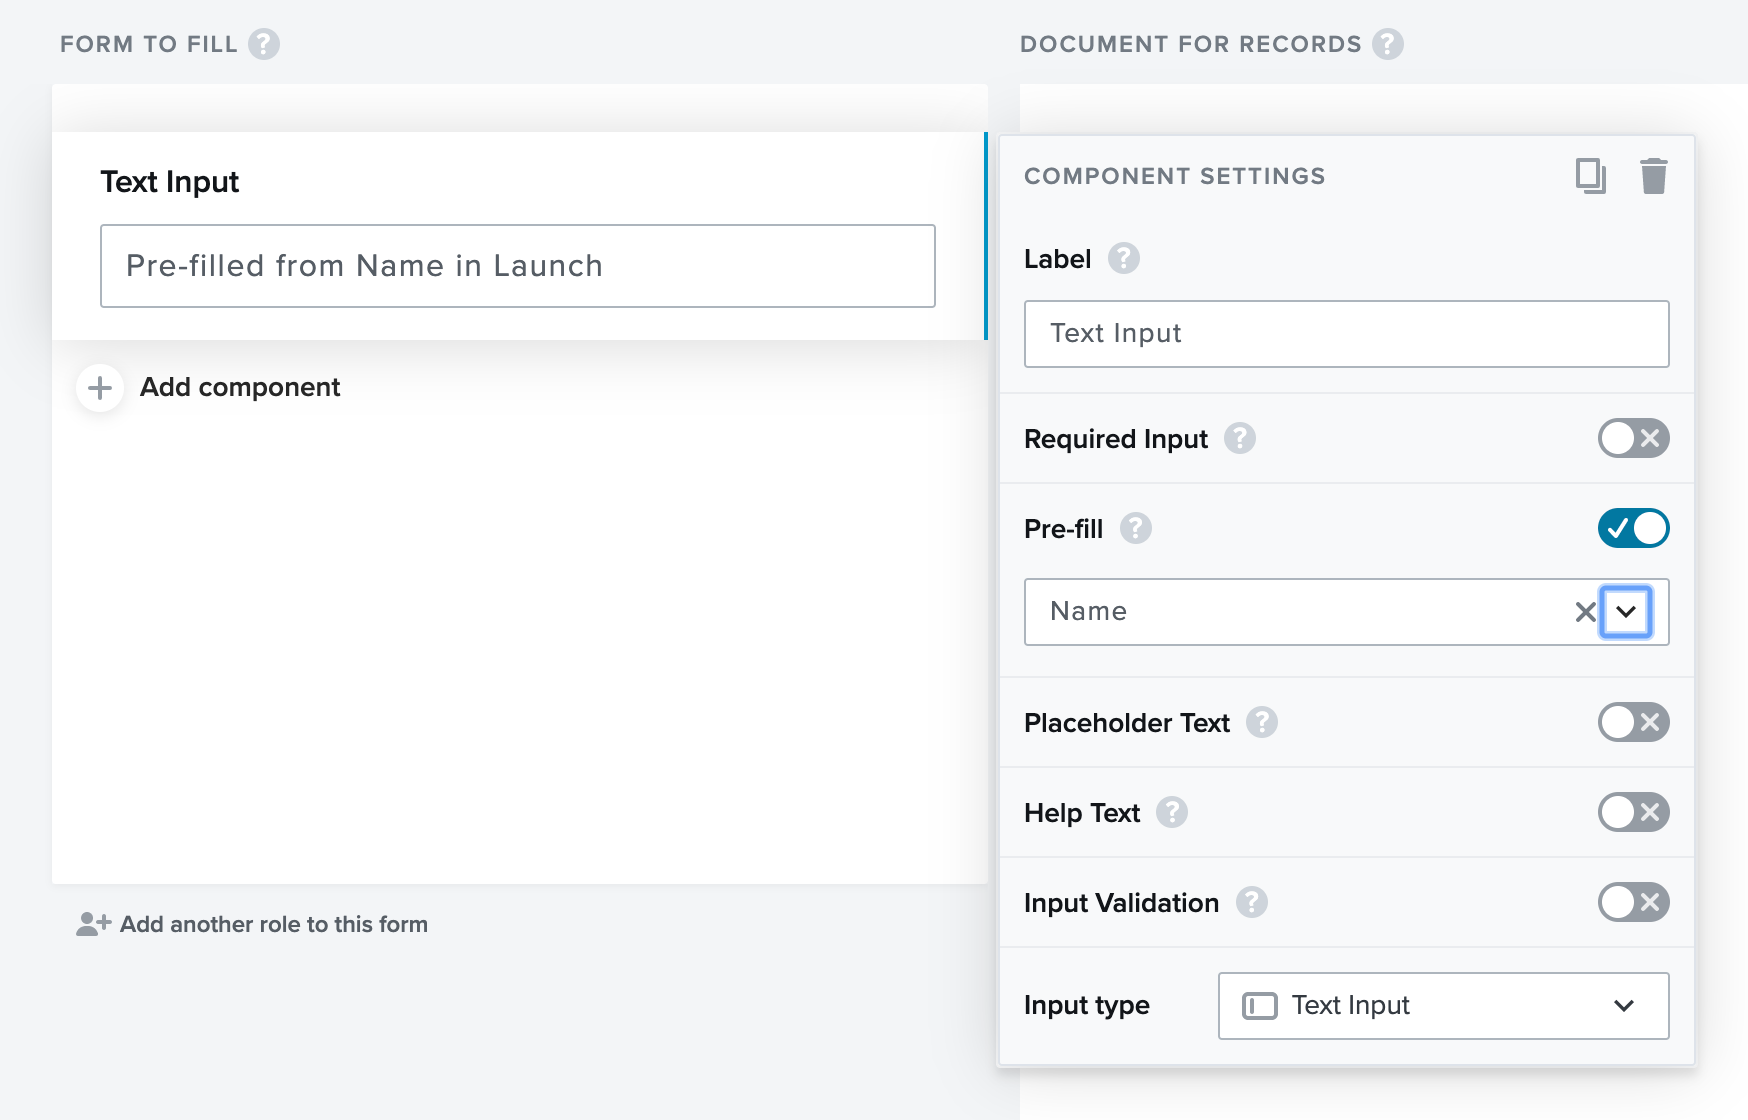
- Return to the dropdown menu below 'Pre-fill' and select the merge field you just created.
- Finish building out your form, repeat steps 1-4 to add more merge fields to your form.
Now you've build out your workflow with your Merge Fields ready to go. When you launch the workflow you'll be prompted to add in the information for those fields so they will be pre-populated for your participants. 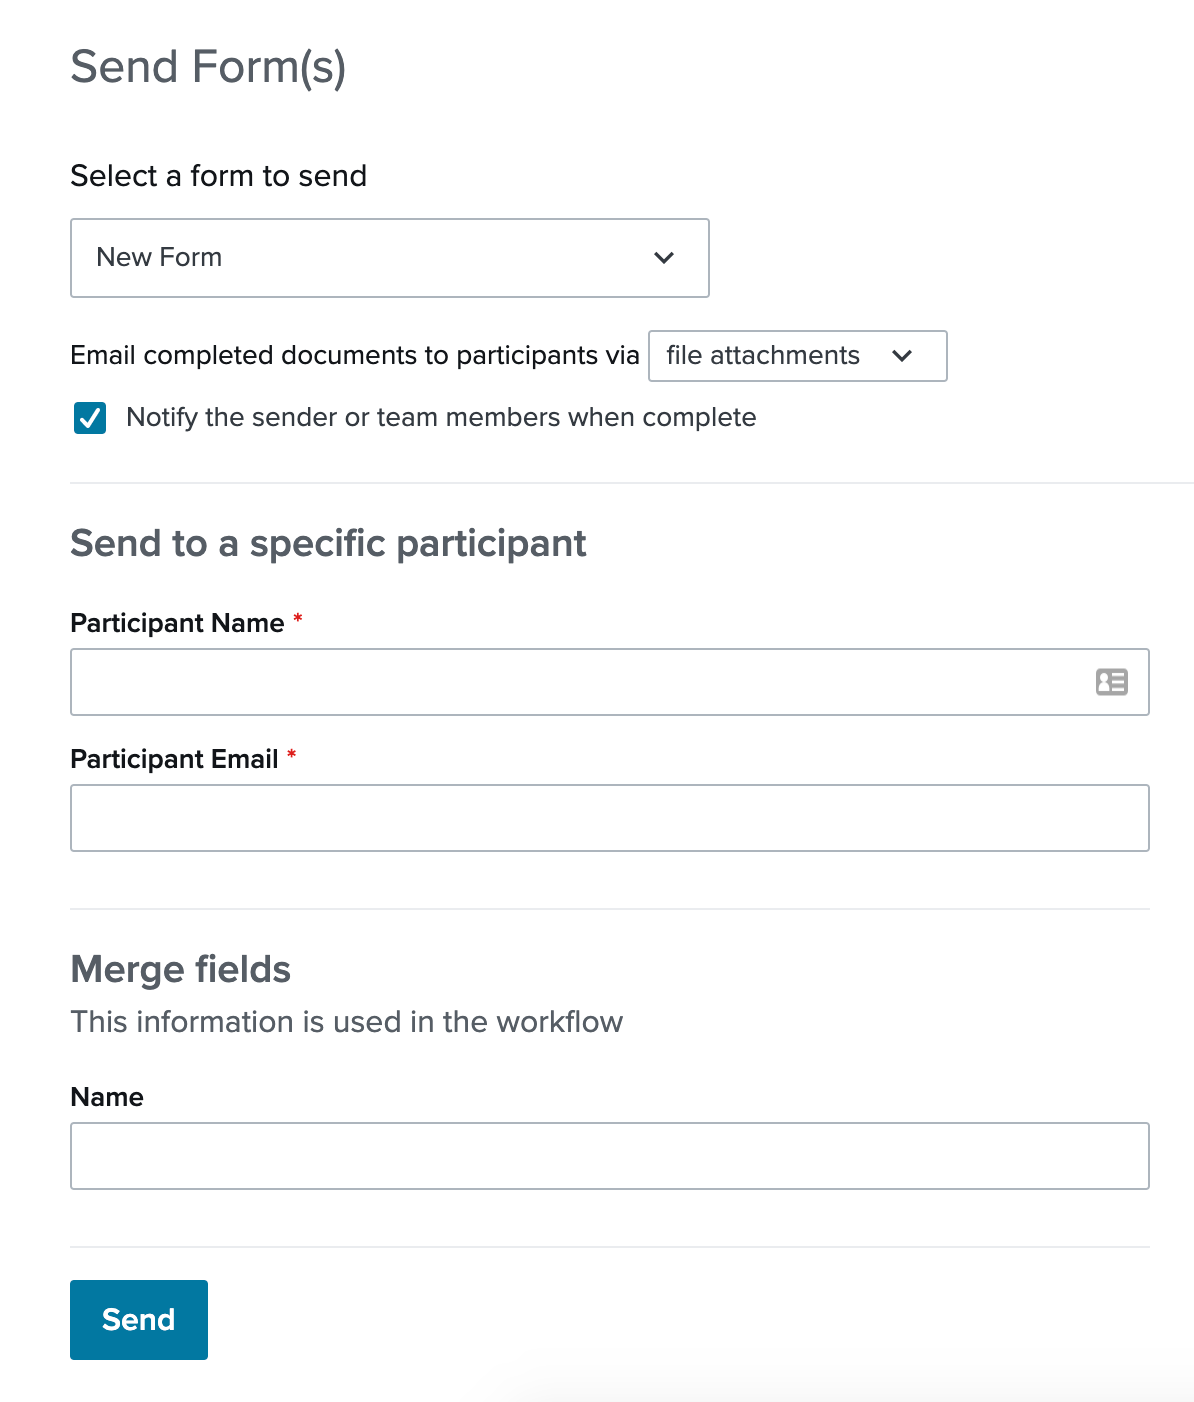
Comments
0 comments
Article is closed for comments.